Saturday, May 9, 2015

How I made the tabs for my Journal

I was asked about the tabs that connect the pages of the journal I created for Ephemera's Vintage Garden which I posted yesterday HERE.  I did take a couple of photos of what the pages looked like prior to adding paper that I am posting below.  Please note that the example for the tabs as pictured below were created for shorter pages.  It's the same technique, I just used bigger tags for pages and thus created longer connectors for the journal created for Ephemera's Vintage Garden.


I cut strips of craft paper 3 x 5 and scored at 1", 1 1/2", and 2".  


Fold in half and create holes with your Bind-it-All, or similar device.  Secure the outer part where the holes are, being careful not to get glue in the holes.  I ran a thin line of tape with my 1/4" ATG gun, but you could also use a red line tape in 1/4".  A glue stick would also work fine as long as you're neat about it and keep the glue out of the holes.  Do not glue the outer portion, you will spread this open and attach to the tags, or whatever you are using as pages.


Now you will spread apart the outer portion and apply glue.  I recommend a soft type of glue stick so you can wiggle it around and line it up as shown below.  I used a scotch craft stick. 


Make a mark on your tags where you will be placing your tabs so they will all be even.  Slip the tag in between the tabs and wiggle around until it's even and secure. 


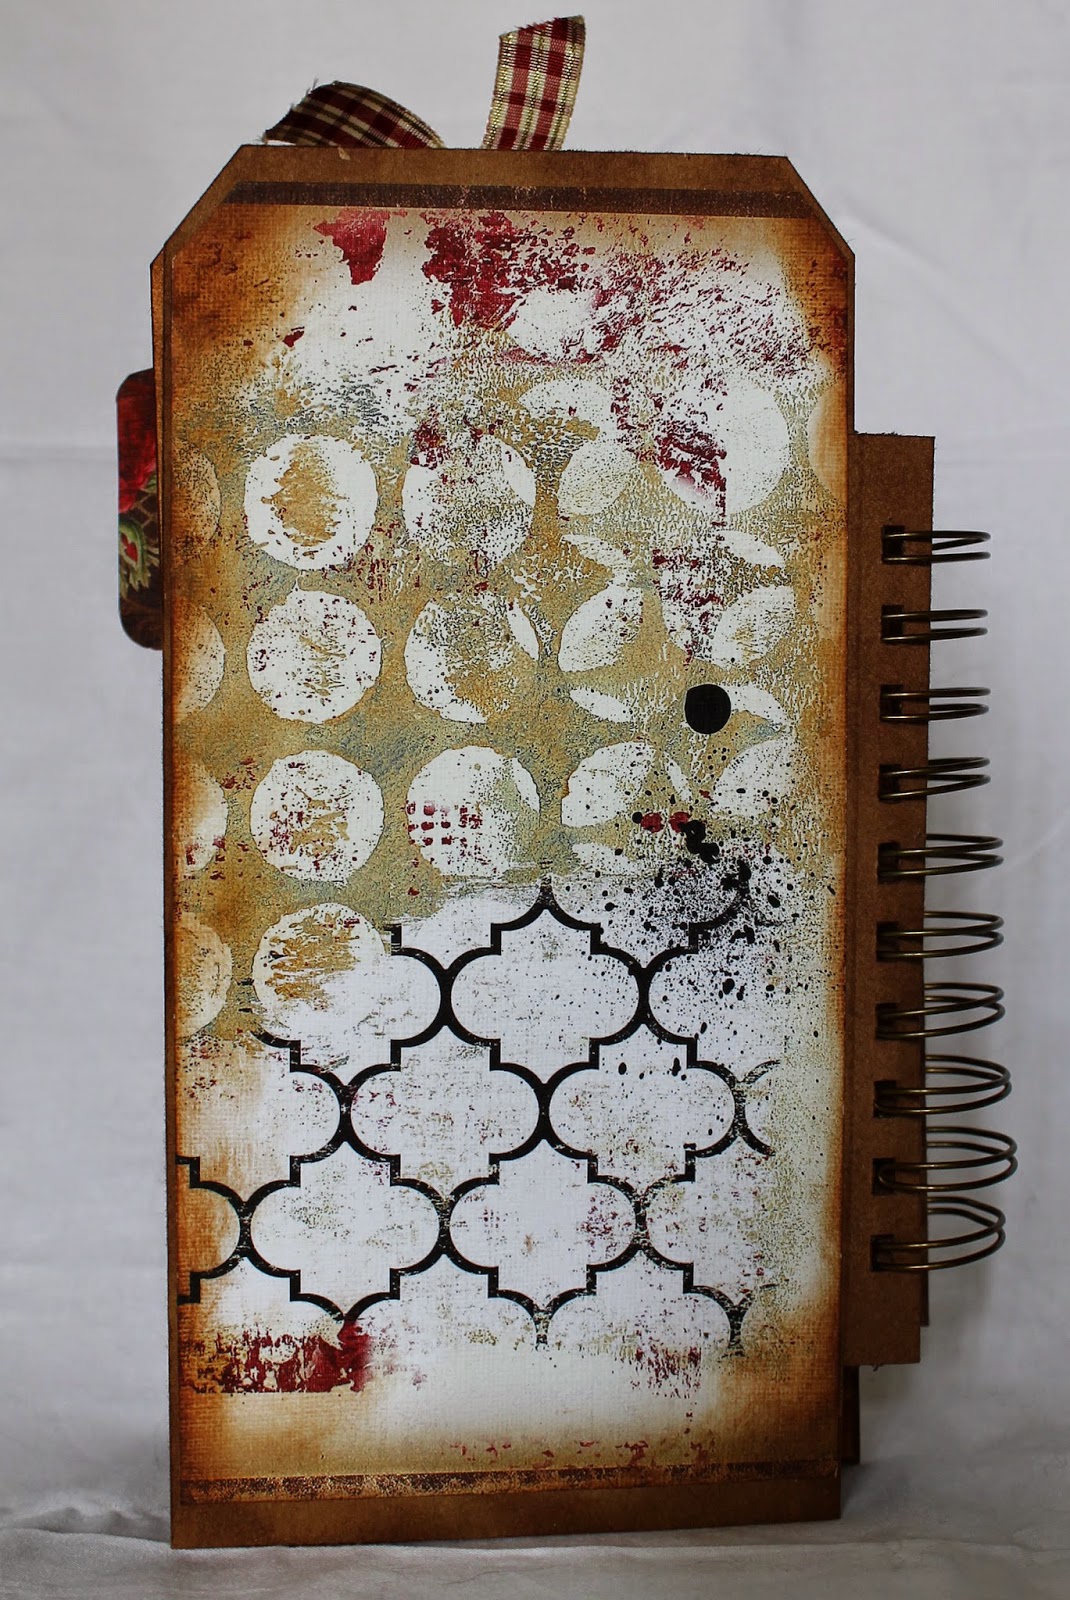
The journal contains many flip open pages.  They were assembled before any patterned paper was added as shown.


Thursday, May 7, 2015

A Vintage Themed Journal for Ephemera's Vintage Garden

Hi Crafty Friends!  I'm so excited about this fun journal I've just finished.  I've created it from the large sized manila shipping tags  It measures approx. 8 1/2" x 4".  I also created chipboard covers. The journal is created mainly from the Mabel's Diary papers, but also features many of the freebie files offered weekly from Ephemera's Vintage Garden.  I apologize for so many photos, but I couldn't help myself, I was having so much fun creating pages.  Since my book is for journaling, I have used one of the freebie lined papers throughout the project.


Ephemera's Vintage Garden
Mabel's Diary

Come by the newly remodeled site where you can shop the collections and sign up for freebies!  The collections are so amazing!


Monday, May 4, 2015

Gecko Galz Samples For May

Hello Crafty friends!  Below are four sample cards I've created for Gecko Galz using the new May products available in the ETSY shop and in the new May Kit Club.  In addition to the new products, I have also incorporated the music note paper from the Vintage Visions mini paper pack.  I love that paper pack, and every sheet is so versatile I use it all the time.  Now on to the May products!  I have created all of my cards this month in a collage style.  There are no ribbons or added dimensional flowers, each card has been created using only our digital background papers and images.

"A Bird in the Hand"
Vintage Visions mini paper pack
FB02 free birds paper pack (May Kit Club)
Corner Bird image FB21 free Birds Icons 2 (May Kit Club)
FB06 Bird in Hand (May Kit Club)
Vintage Lady from the Color Cuties collage sheet

"Don't Let Life Ruffle Your Feathers"
Vintage Visions mini paper pack
FB05 Free Birds paper pack (May Kit Club)
FB19 Free Birds Icons 2 (May Kit Club)
Fables 2 Collage Sheet

"Love is a Song"
FB01 Free Birds paper pack (May Kit Club)
TJ01 Toile Jolie paper pack (May Kit Club)
FB20 Free Birds Icons 2 (May Kit Club)
Colorful Cuties 2 collage sheet

"A Little Bird Told Me"
Vintage Visions mini paper pack
FB01 Free Birds paper pack (May Kit Club)
FB25 Free Birds Icons 2 (May Kit Club)
FB08 Free Birds paper pack (May Kit Club)


Friday, May 1, 2015

May Customer Challenge Entry for Gecko Galz with step-by-step

Hello Crafty Friends!  It's time for a new challenge at the Gecko Galz Blogspot.  This month our Challenge theme is "Flying High, things with wings"
You will have until May 29th to enter.  There is only one rule.  You will need to use at least ONE  product from Gecko Galz!!
It can be one of our free products, digital stamps, collage sheet images, or digital papers!!  It is up to you!!
The winner will receive a $25 Gecko Galz Shopping Spree in our Etsy shop.

Below is my entry with step-by-step instructions to create this card.


Begin with a manila card stock base.

Add a mat from the Tim Holtz core-dinations distress collection.  I used green to bring out the green ribbon in my image.

Sand the paper to distress and reveal some of the core.

Print out the following background papers and images:

VP3 from the Vintage Visions mini paper pack (music notes)
FB04 from the free birds paper pack digital background paper (April Kit Club)
FB12 feather images (April Kit Club free birds icons 1)
FB19 red bird in cage (April Kit Club free birds icons 2)
Vintage lady image from the Colorful Cuties 2 collage sheet

Cut the free birds background paper to cover about 2/3 of the way across the card and round the corners.  Cut the paper so that it fits the image nicely to reveal the greenery, and leave a little space at the bottom for your sentiment. 

Attach to the green cardstock base.  

Cut a tag shape from the vintage vision paper, and place over the patterned paper at a slight angle. 

Mat the vintage lady image with manila cardstock and attach.

Fussy cut the feather image and add with dimensional pop dots.

Fussy cut the bird image from the caged bird, cutting off the tail portion, and perch atop the branches in the background paper.

Embellish with buttons

Print and add a sentiment of your choice.